
CSV Import
Tutorial on Customer CSV Import & Export
This guide explains how to import and export customer data using CSV files in a simple step-by-step format.
Customer CSV Import
Customer CSV Import allows you to add new customers or update existing ones in bulk using a CSV file.
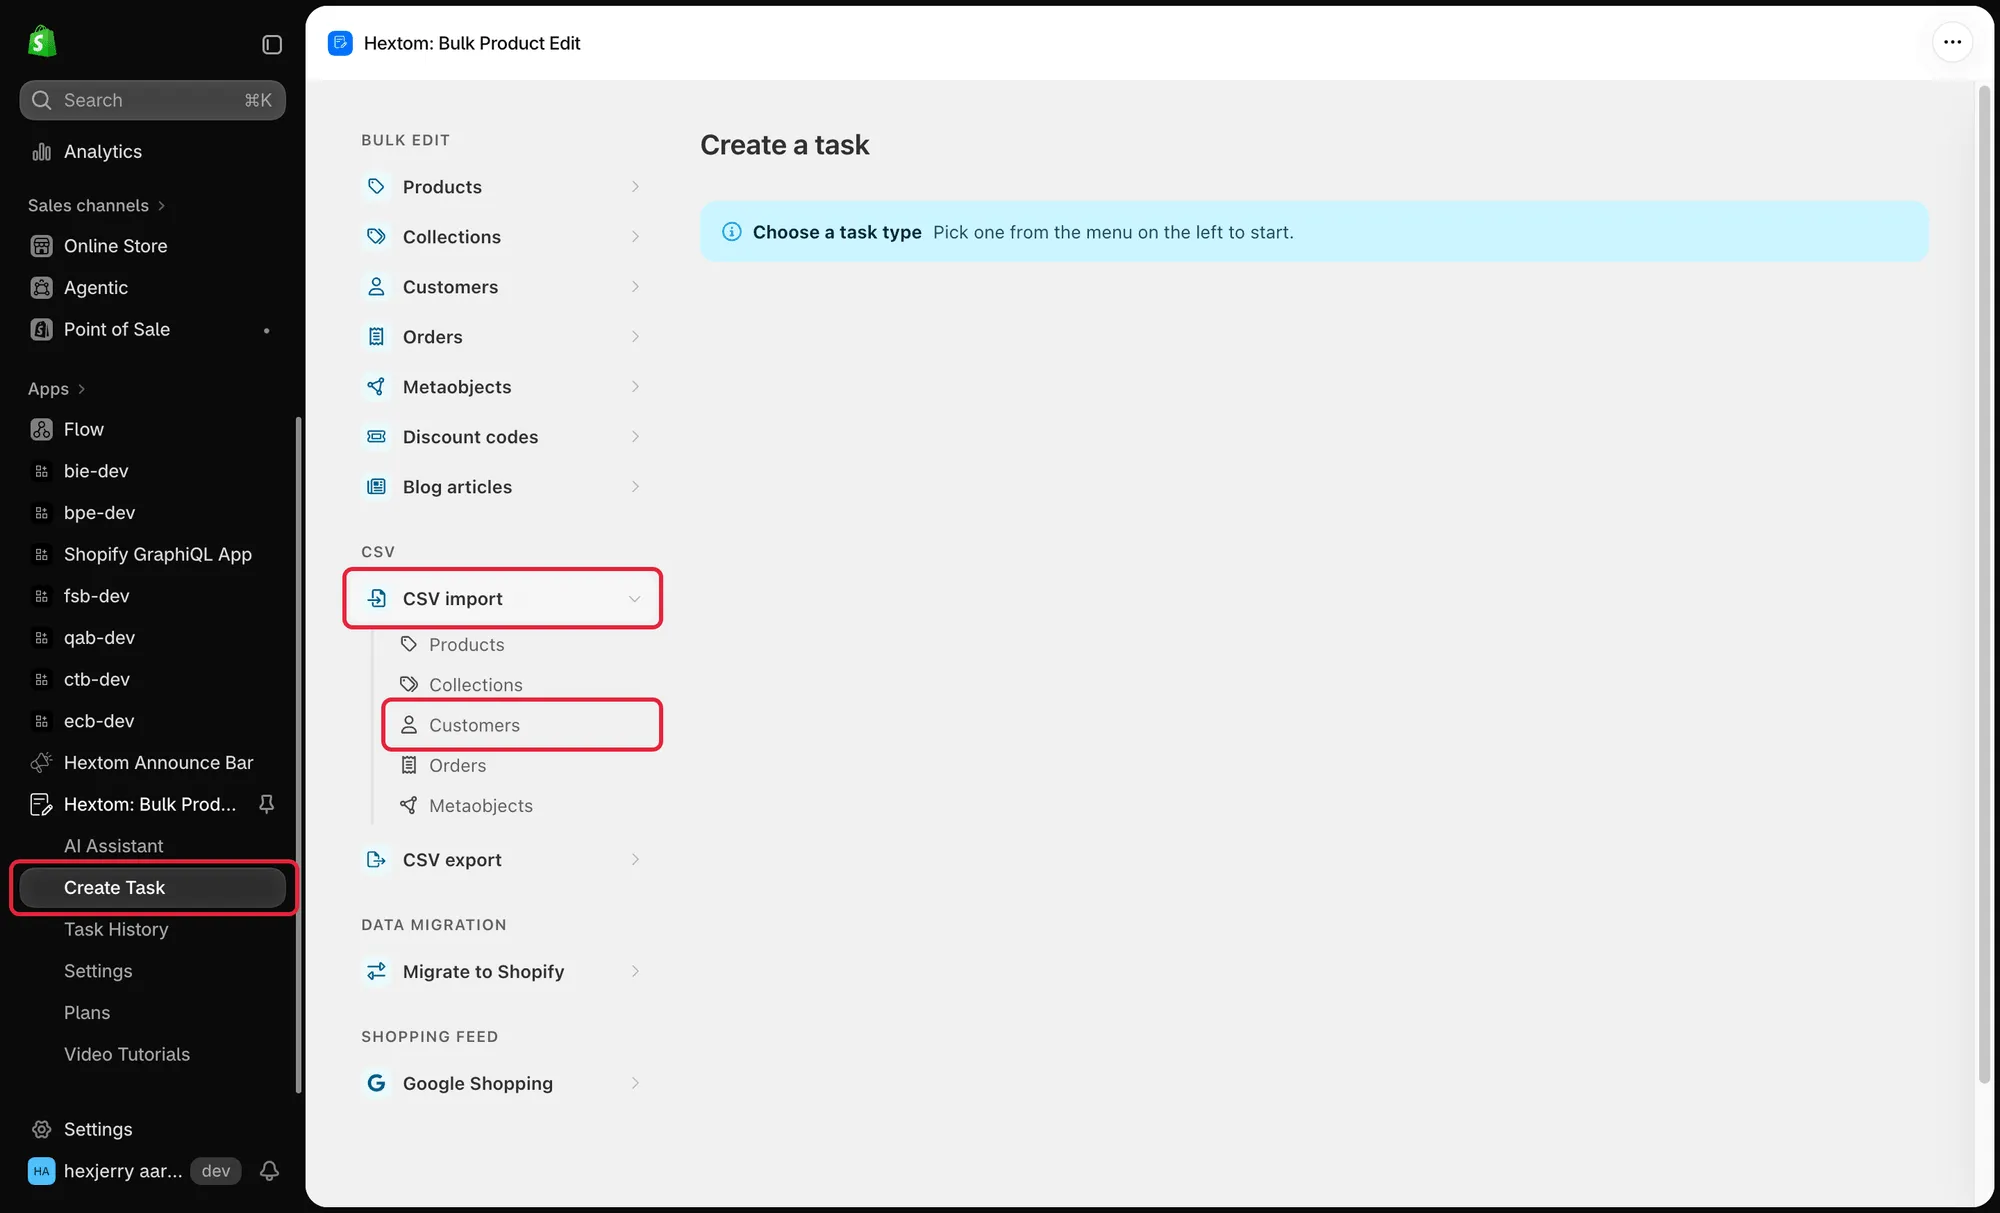
Step 1: Choose Import Type
Select whether you want to add new customers or update existing customer records.

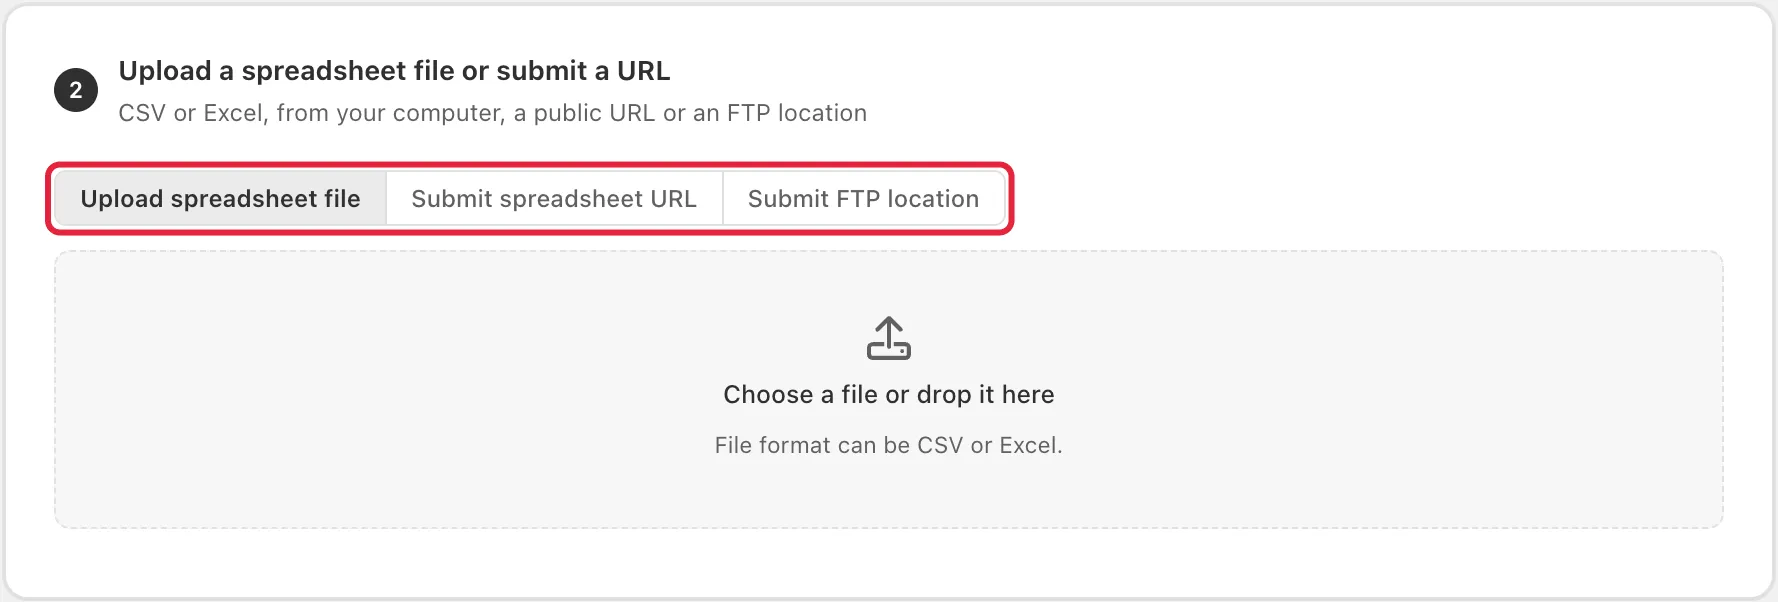
Step 2: Upload Your File
Upload your CSV file from your device, a public spreadsheet URL, or an FTP/SFTP location.
Step 3: Map Your Columns
Map each column in your CSV file to the corresponding customer field in the app to import the data accurately.
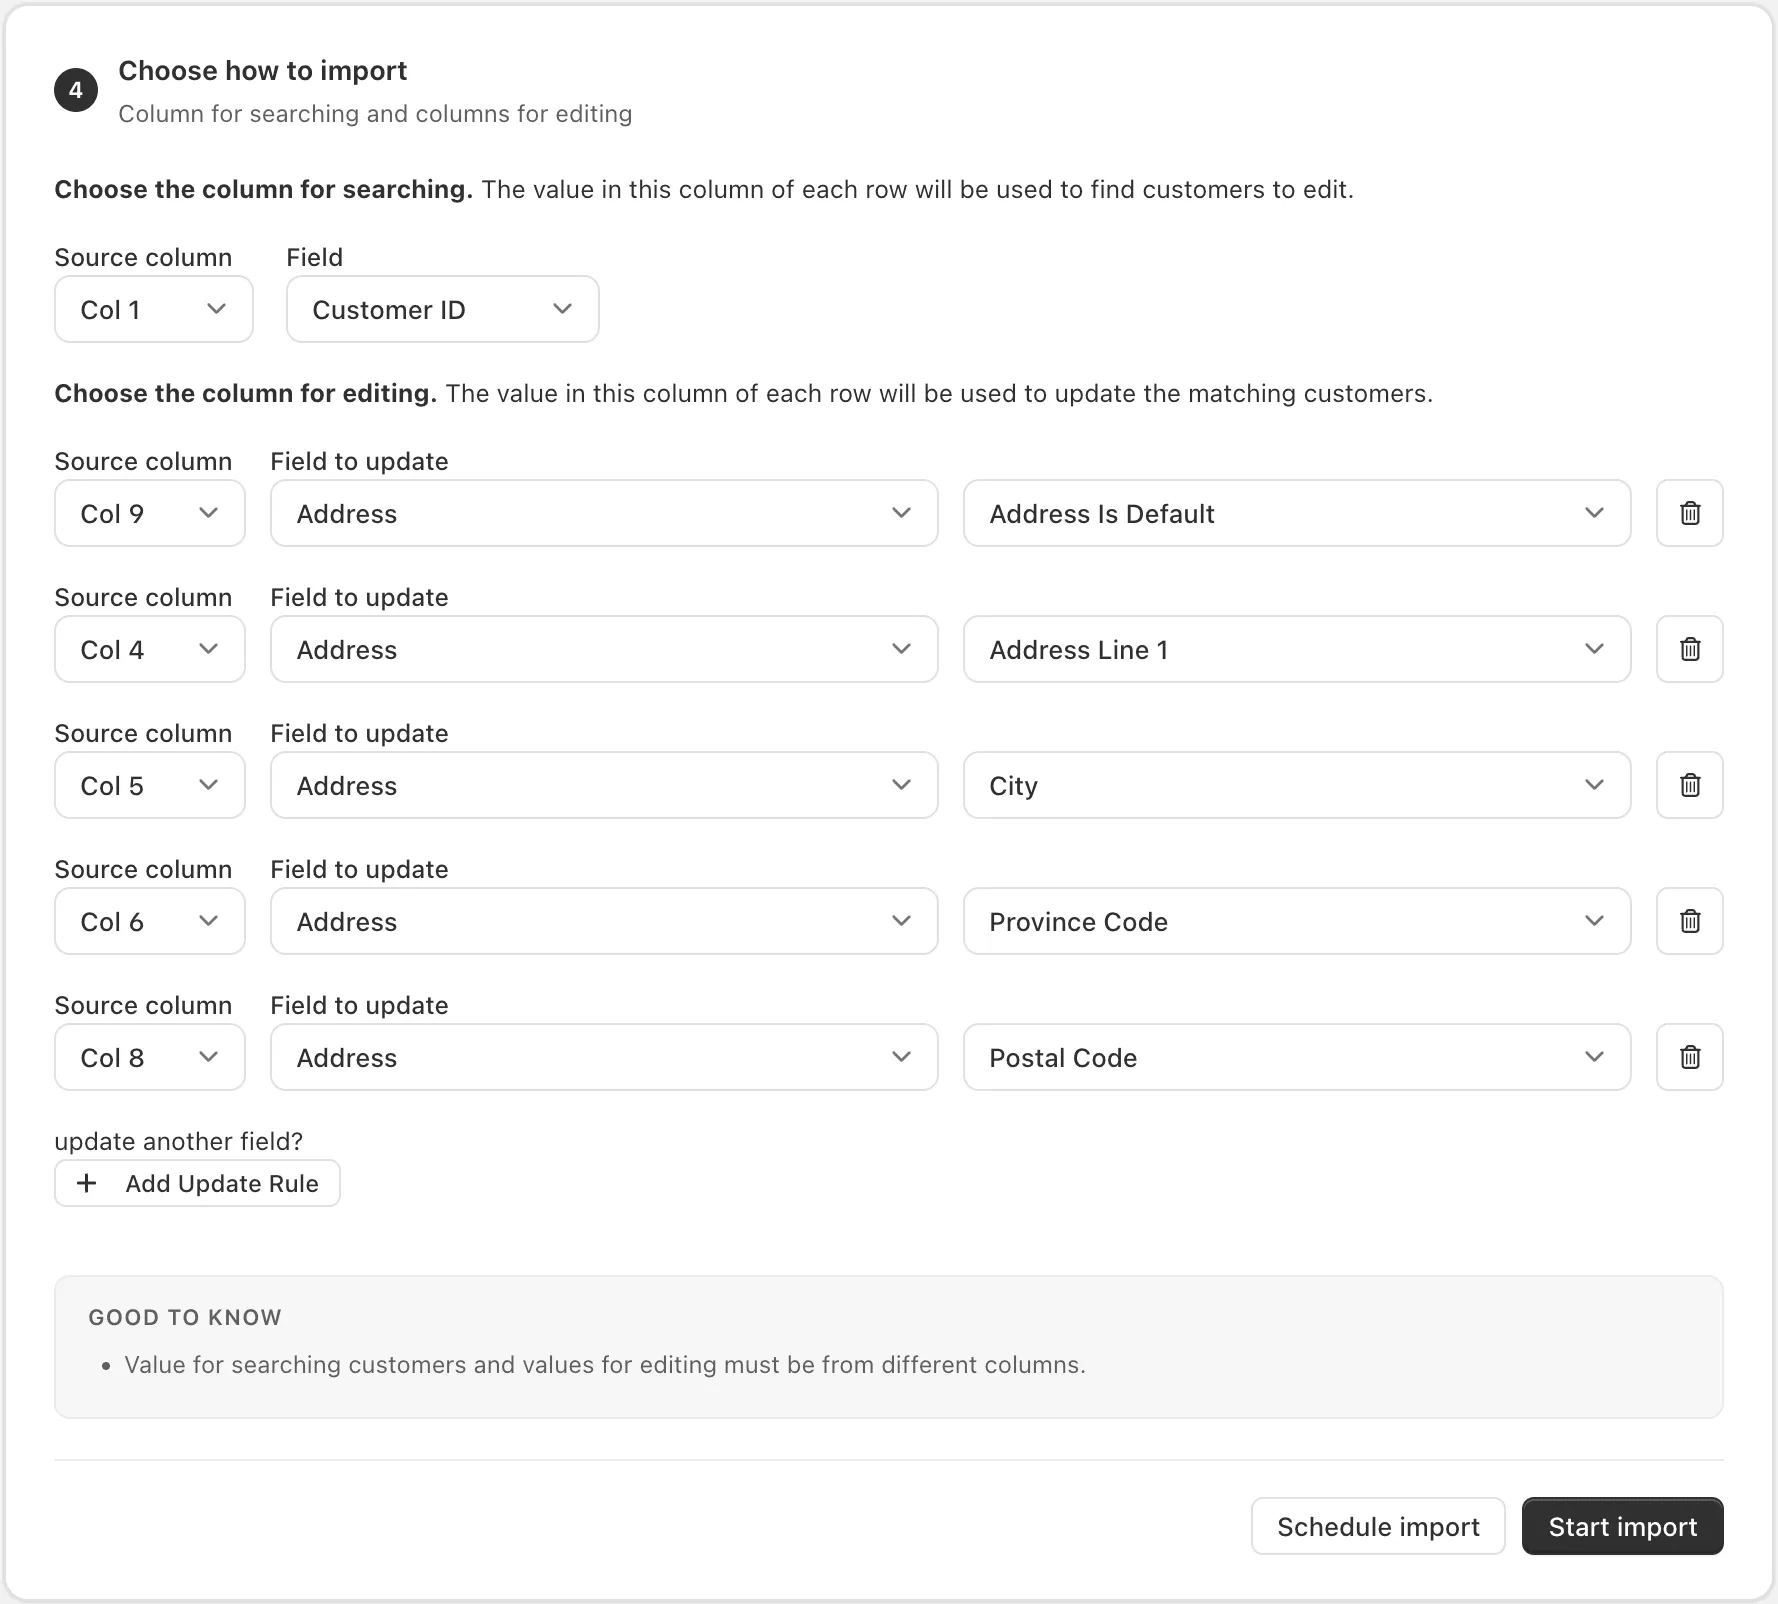
Step 4: Start the Import Task
Click Start import to process the file. You can check the progress of the task under Task History > Import tasks.

Note: Adding a New Address for Existing Customers
New addresses for existing customers cannot be set as the default in the same task because Shopify requires an Address ID. You will need two tasks: one to add the address and another to set it as default using the Address ID.
Customer CSV Export
Customer CSV Export allows you to download customer data in bulk from your store.
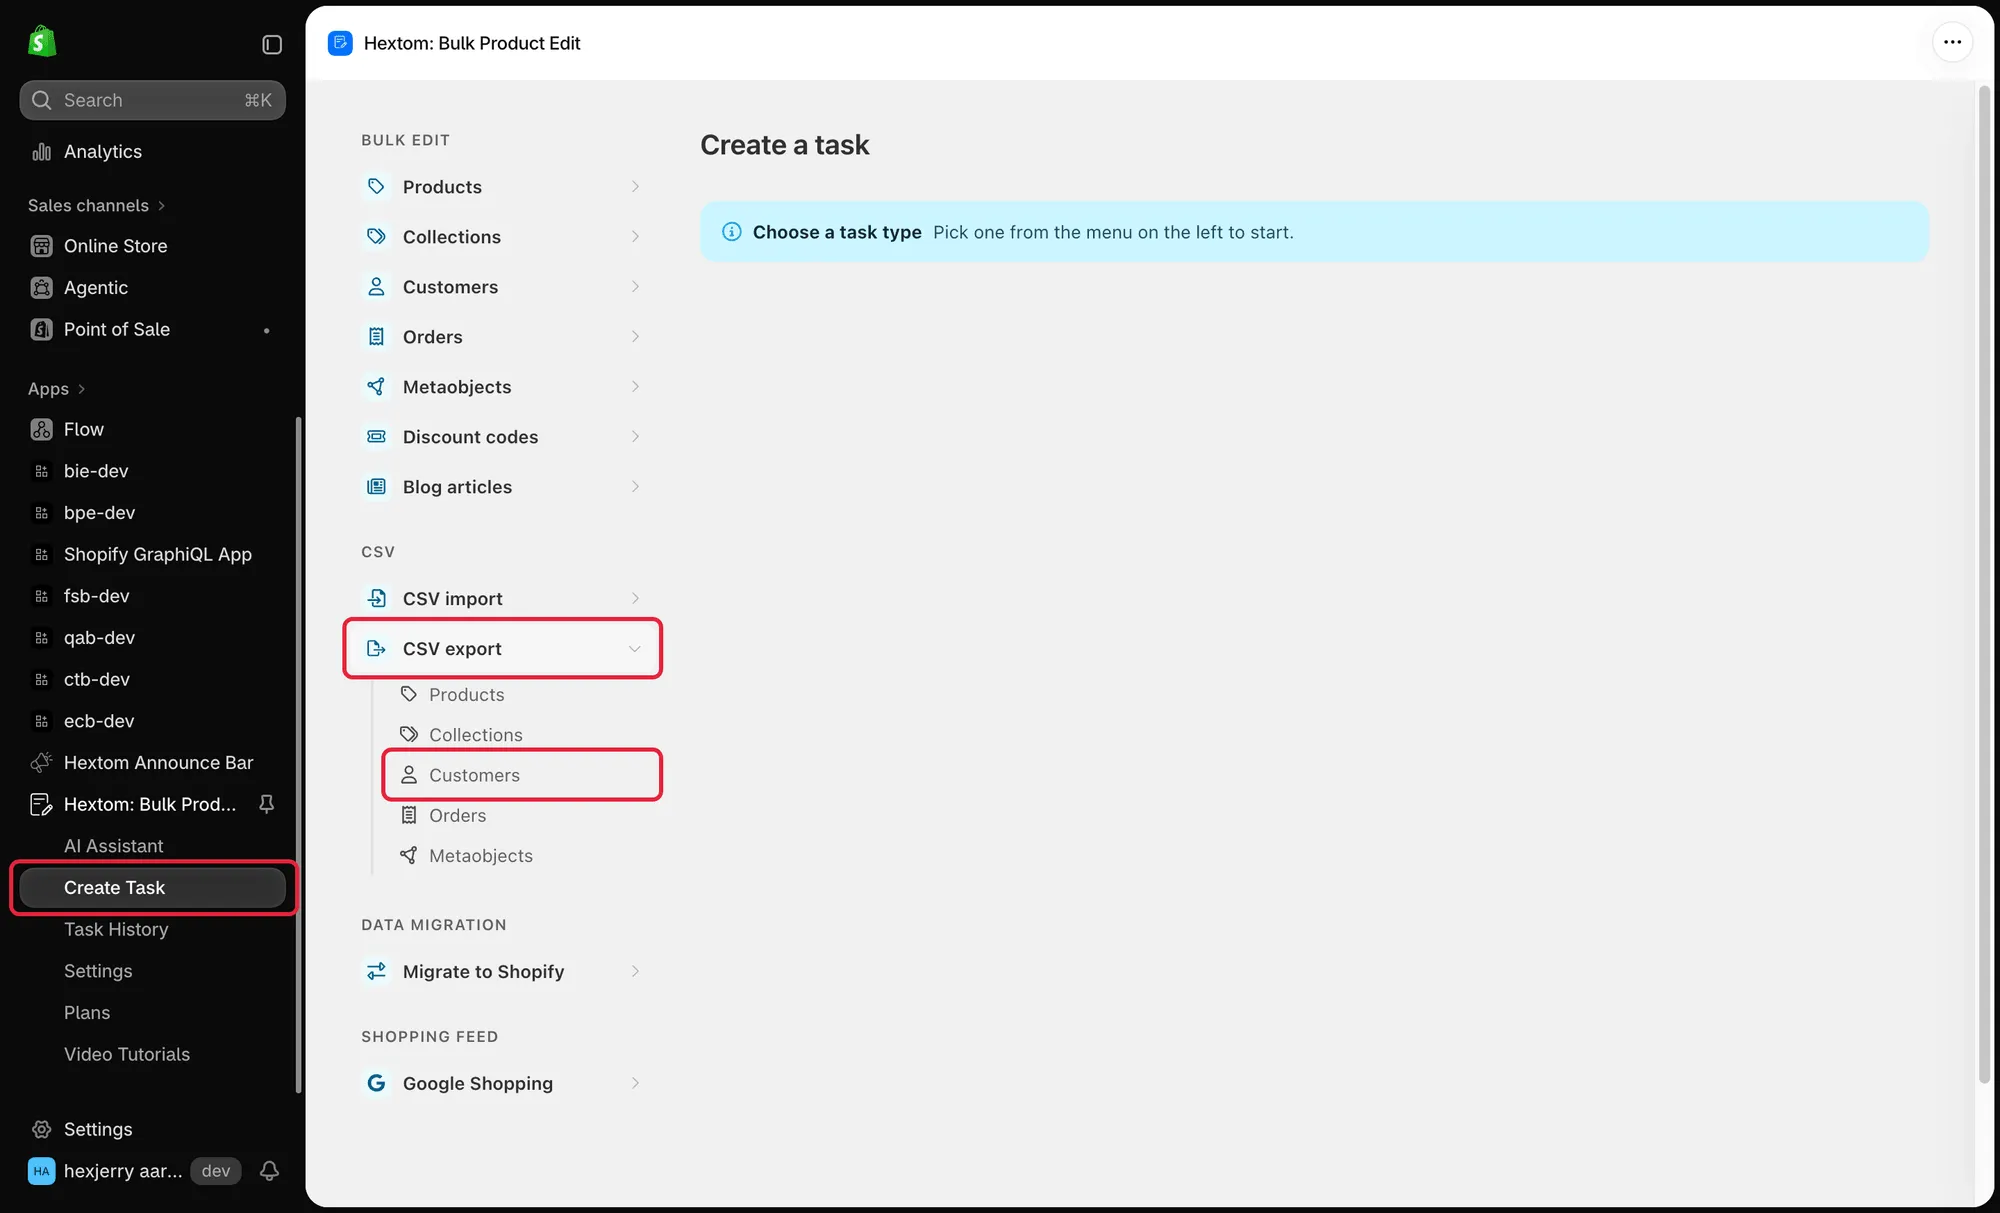
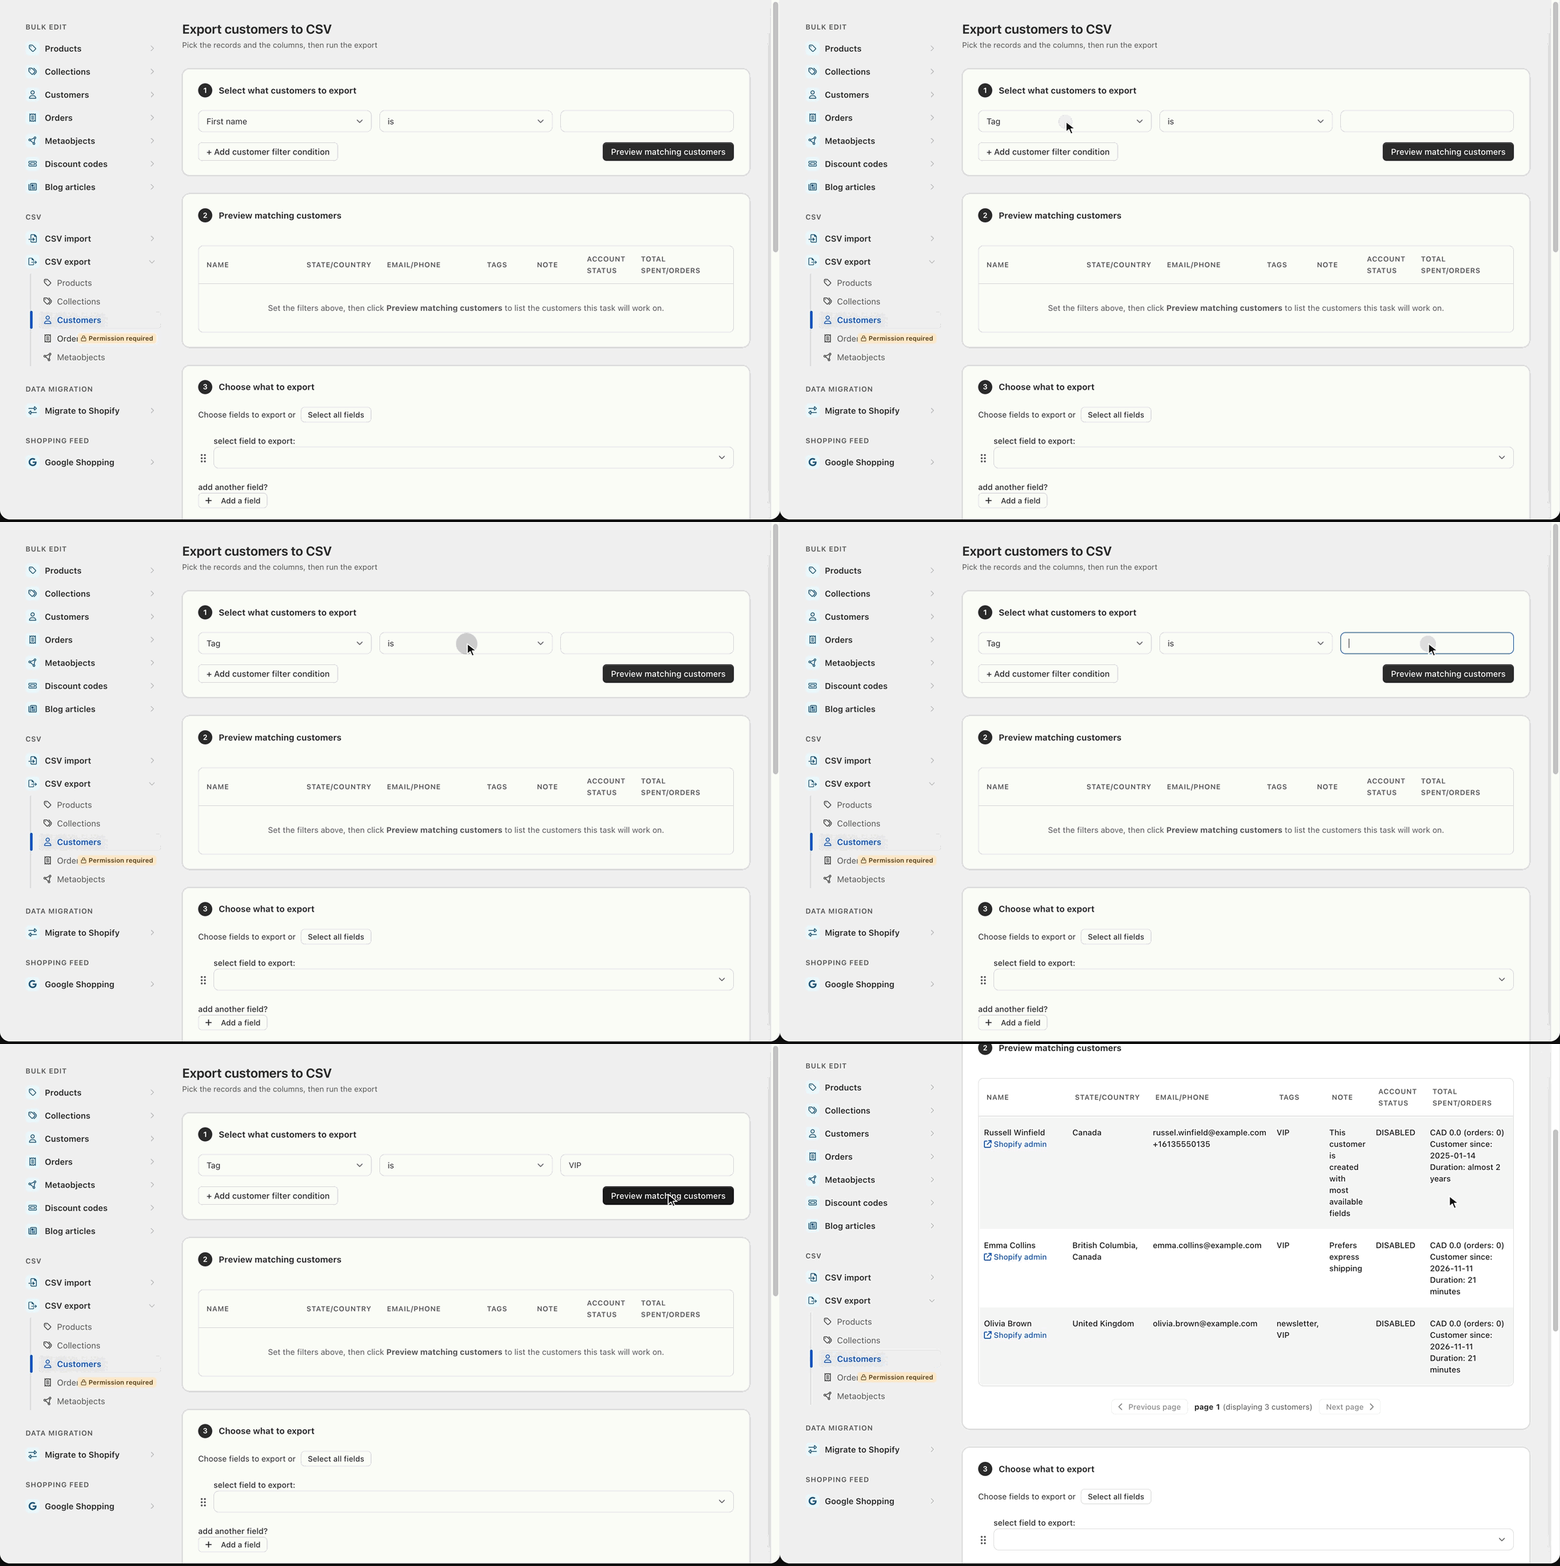
Step 1: Filter Customers
Filter the customers you want to include in the export based on tags, creation date, or other conditions.
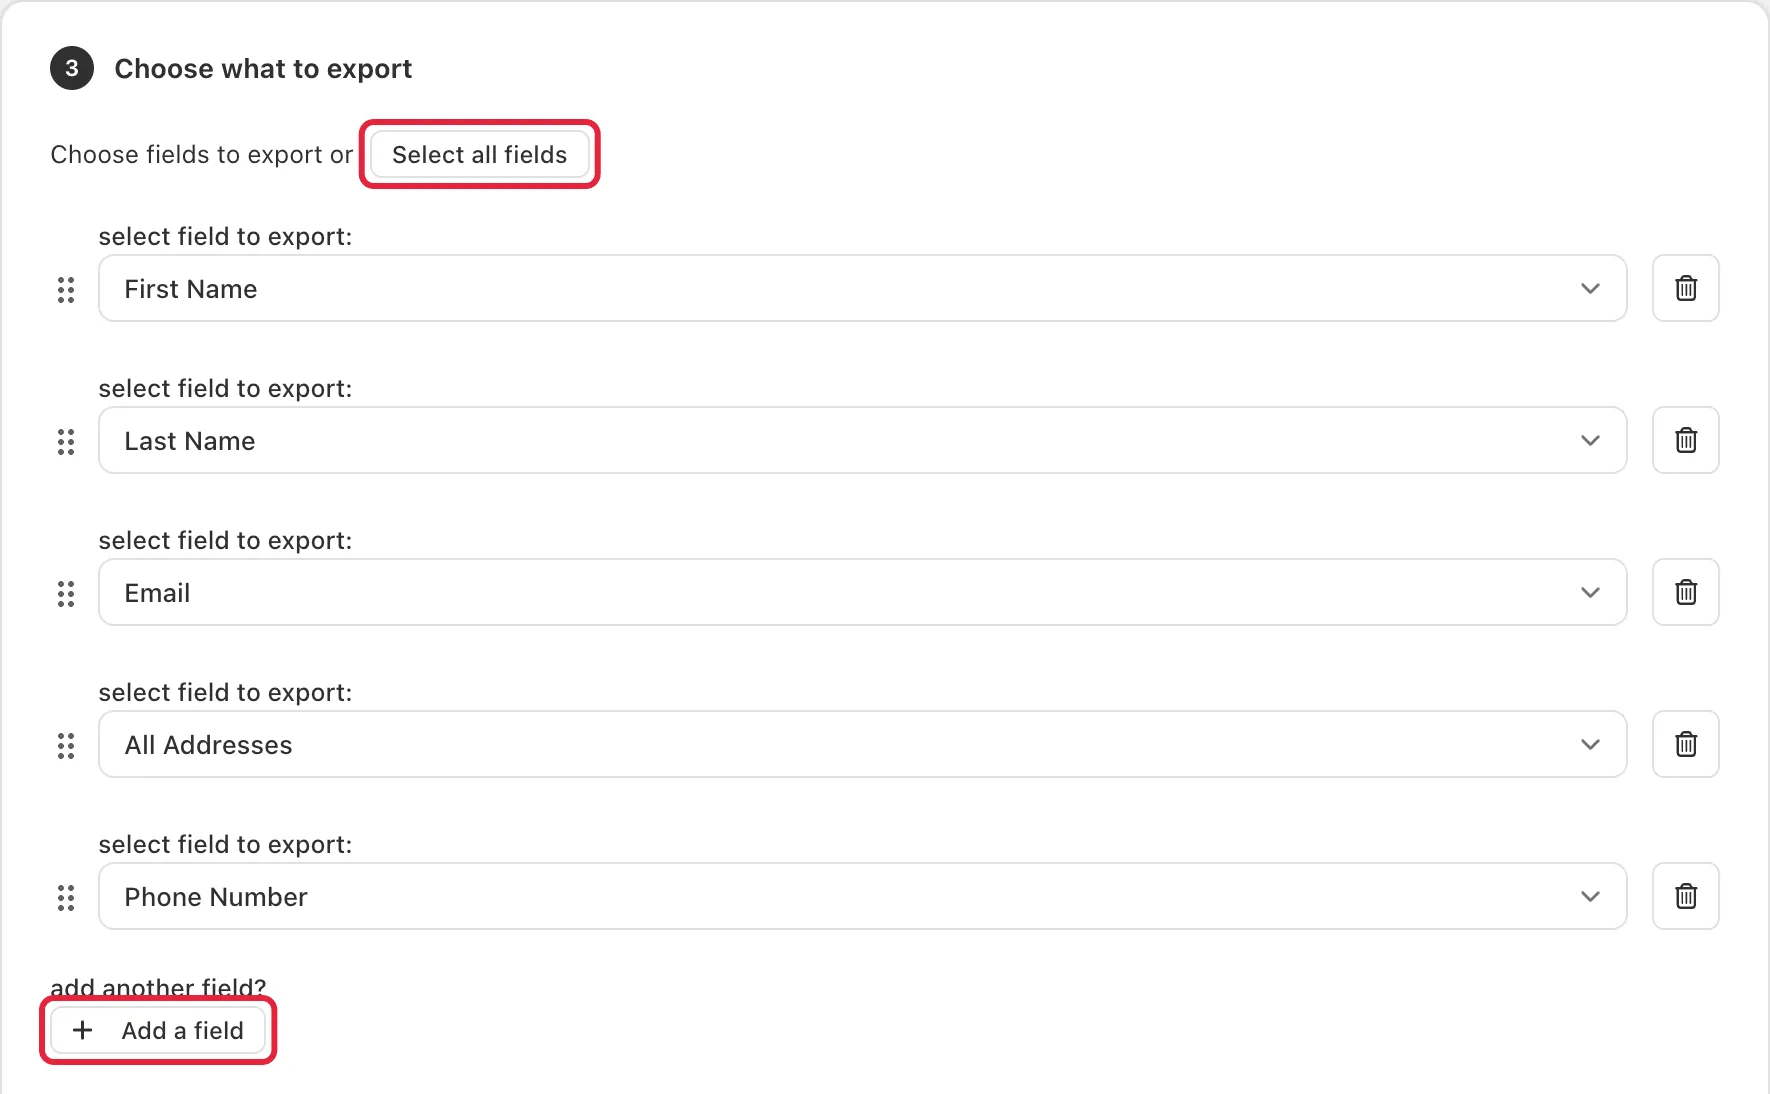
Step 2: Select Fields to Export
Select the fields you want to include in your CSV or choose “Select All Fields” to export all available data.
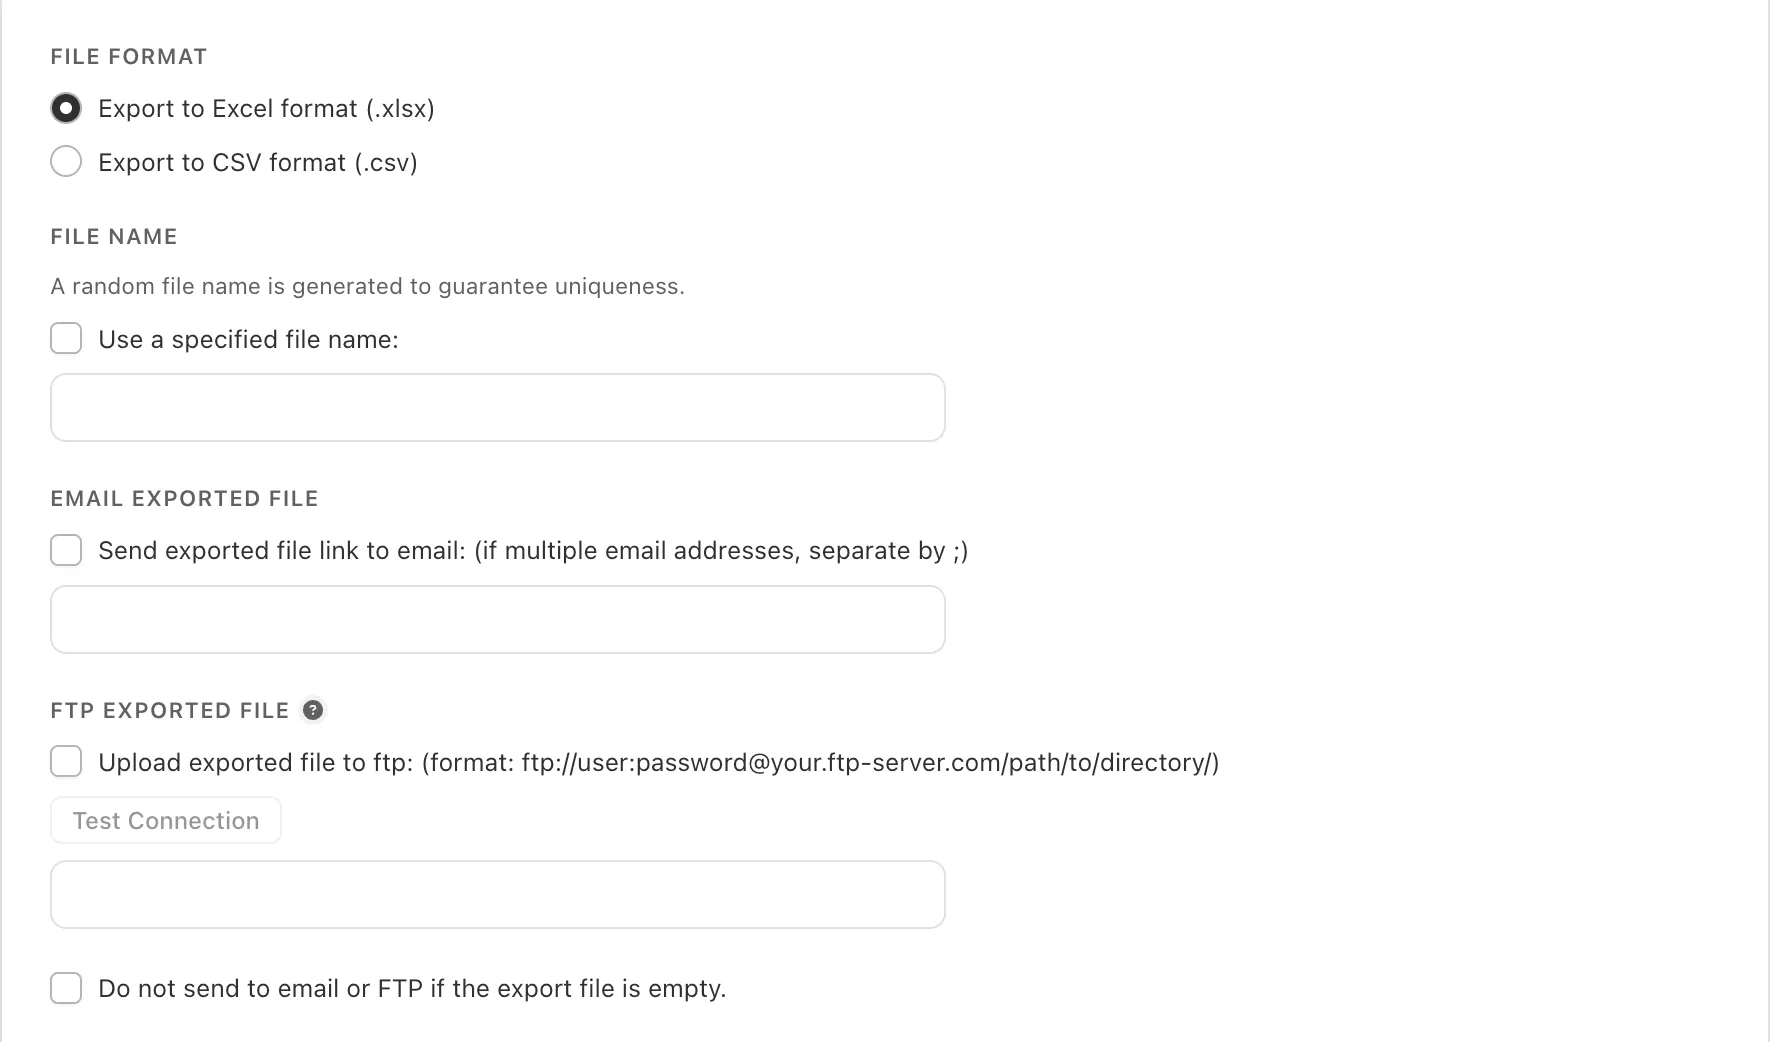
Step 3: (Optional) Adjust Export Settings
Set a custom file name, select a file format, and optionally email the file or upload it to an FTP/SFTP server.
Step 4: Start the CSV Export Task
Click Start export to process the file. You can check the task progress and download the file once the export is finished under Task History > Export tasks.

You can always reach out to us at help@hextom.com if you have any questions for us!