
Bulk Customer Edit
Tutorials on Editing Customer Metafields
1. Set up the customer filter
Before anything, make sure that you are in the correct section of the app. Click Create Task in the app menu, open Customers, then click Metafields
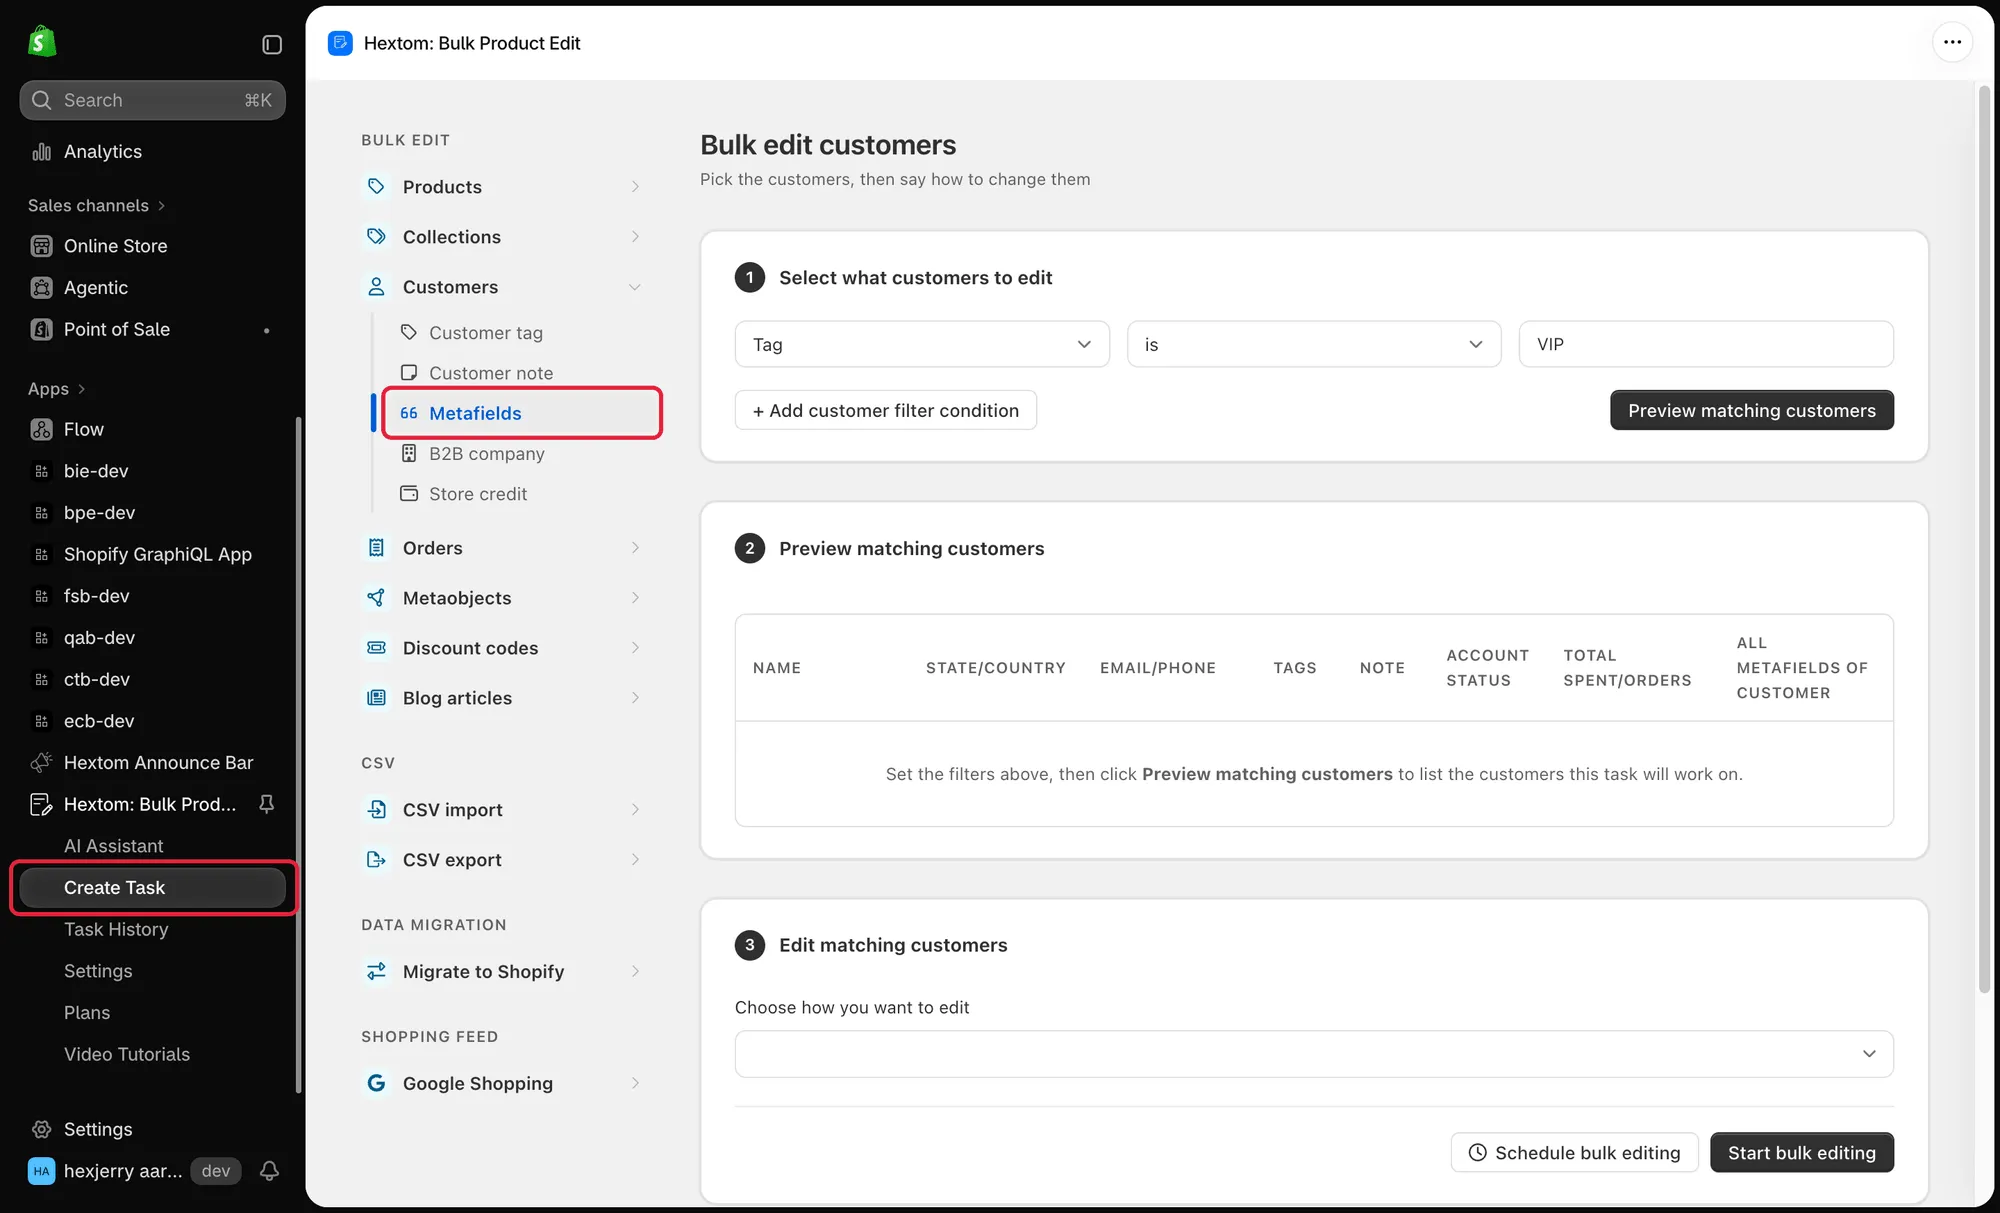
The first step to setting up a bulk edit is to set up the filters. Our app has many fields that you can filter from, which can help you narrow down the products that you would like our app to edit. Our app also comes with a preview function, so that you can verify if the products found are correct.
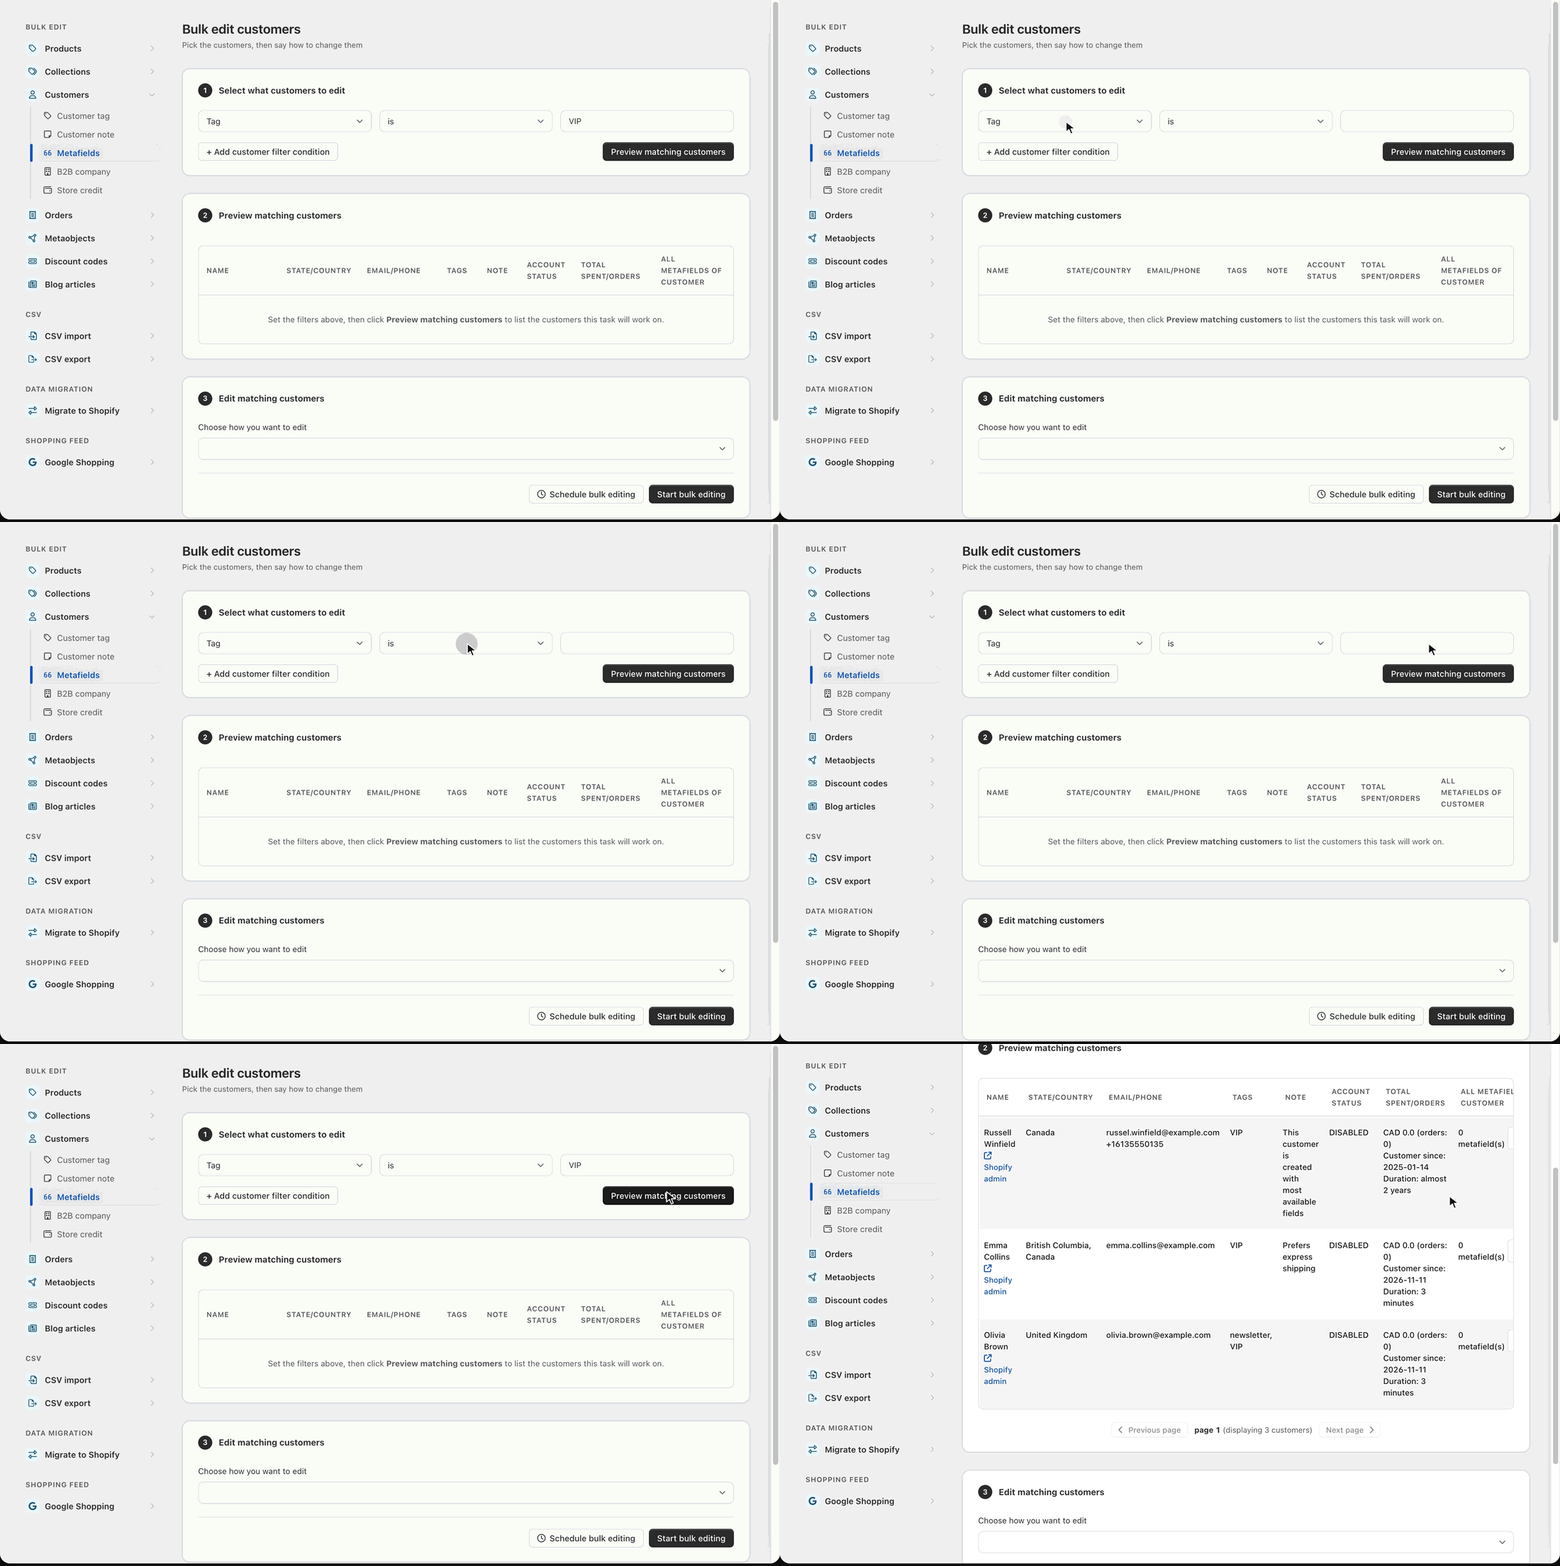
2. Select how to edit the Customer metafield
You can choose multiple functions from here and set up the function as needed. For this guide, I will be choosing “add or edit metafield to customer”. Please do note that there are a few options for this.
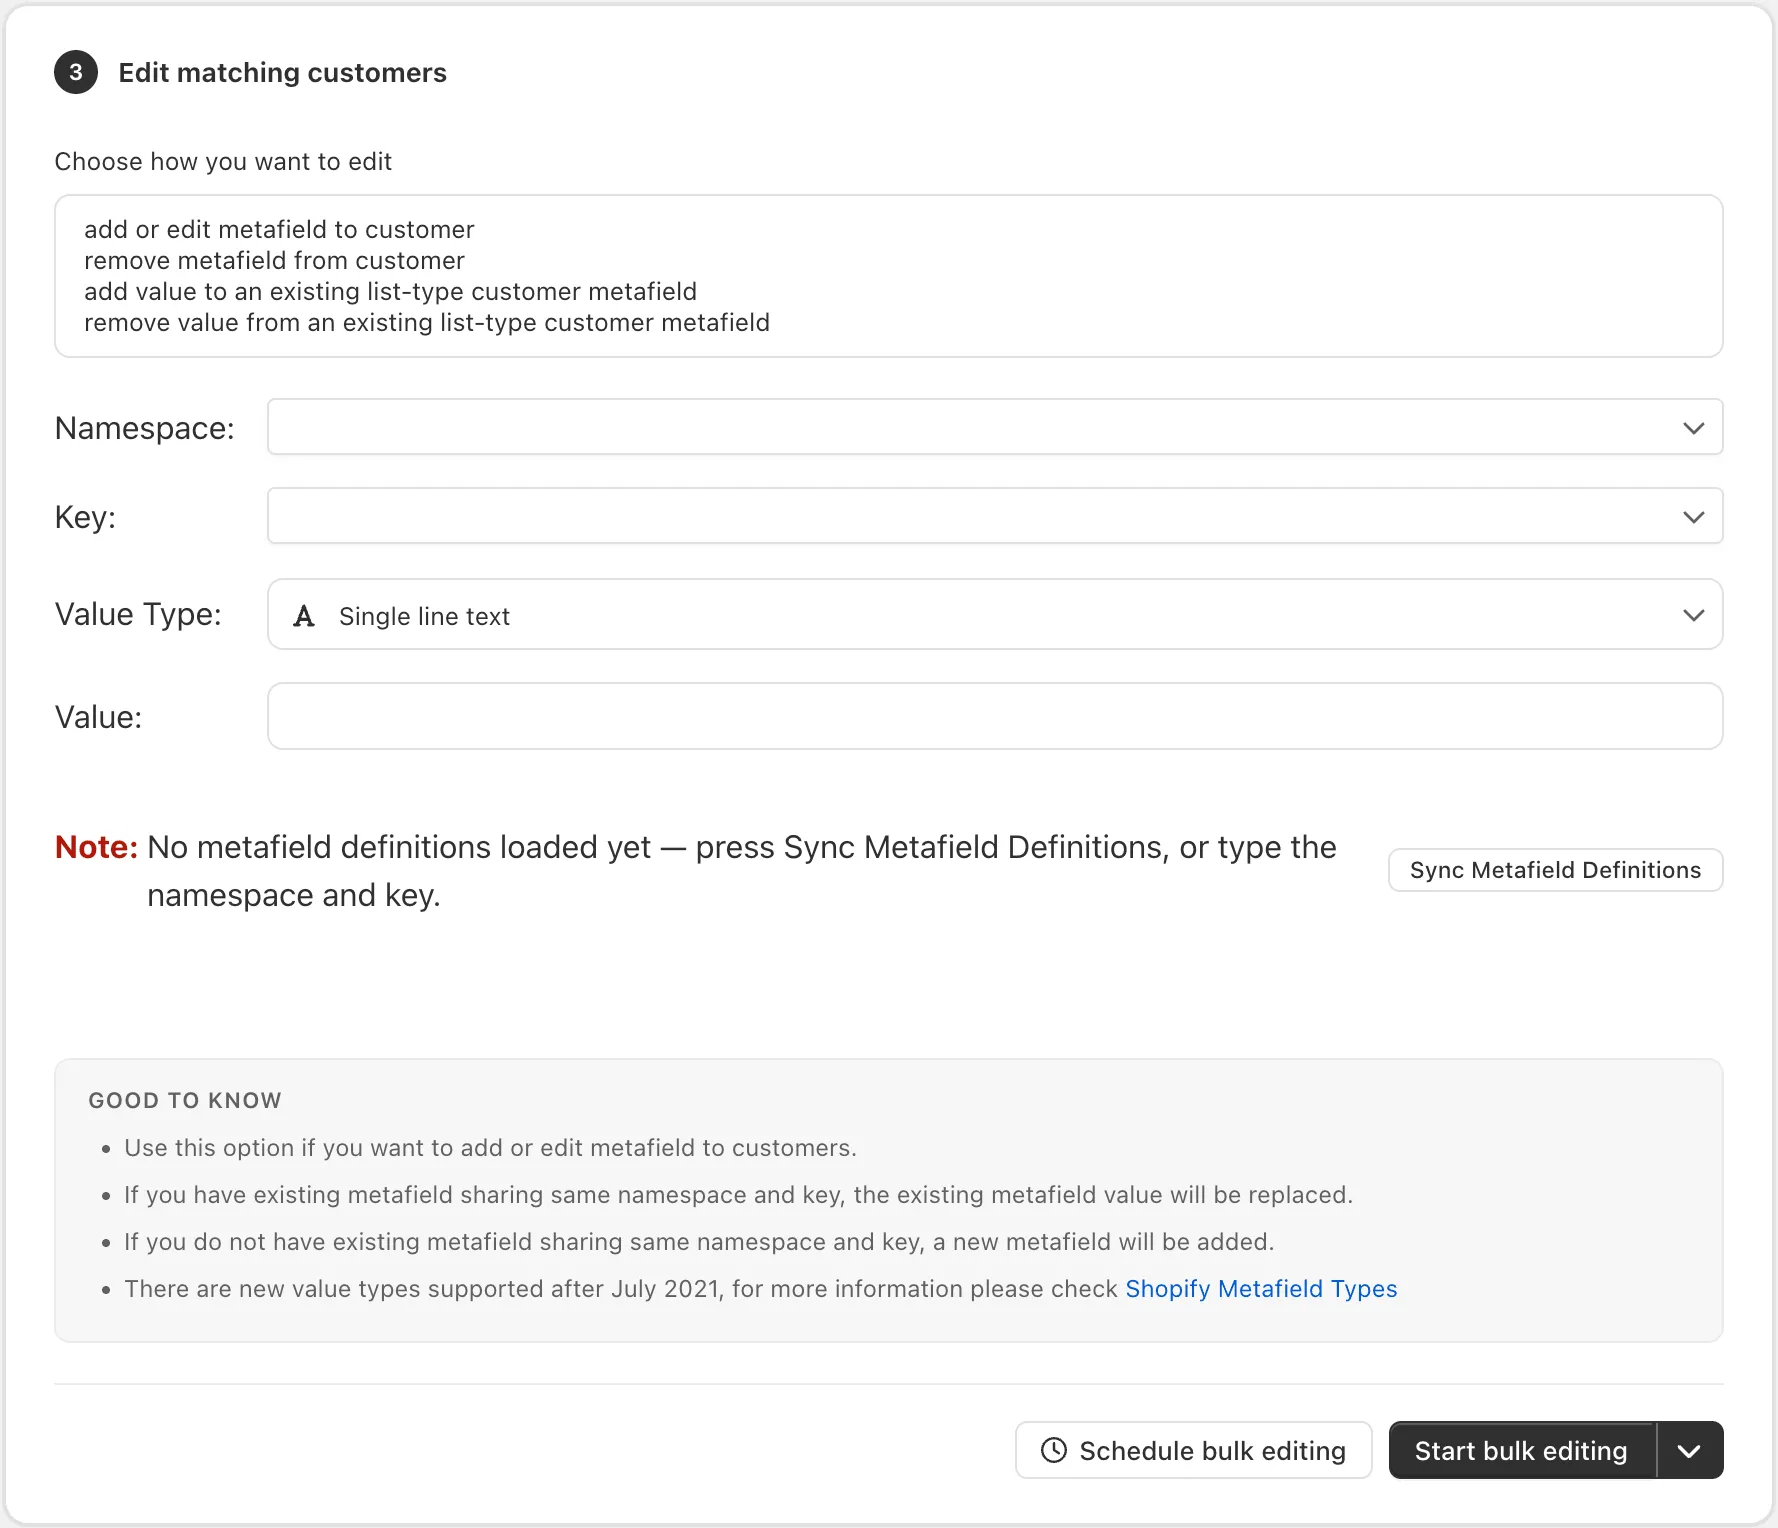
I will be putting “custom” and “status” to the namespace field and key respectively. After this, i will be putting the value “Regular Customer”
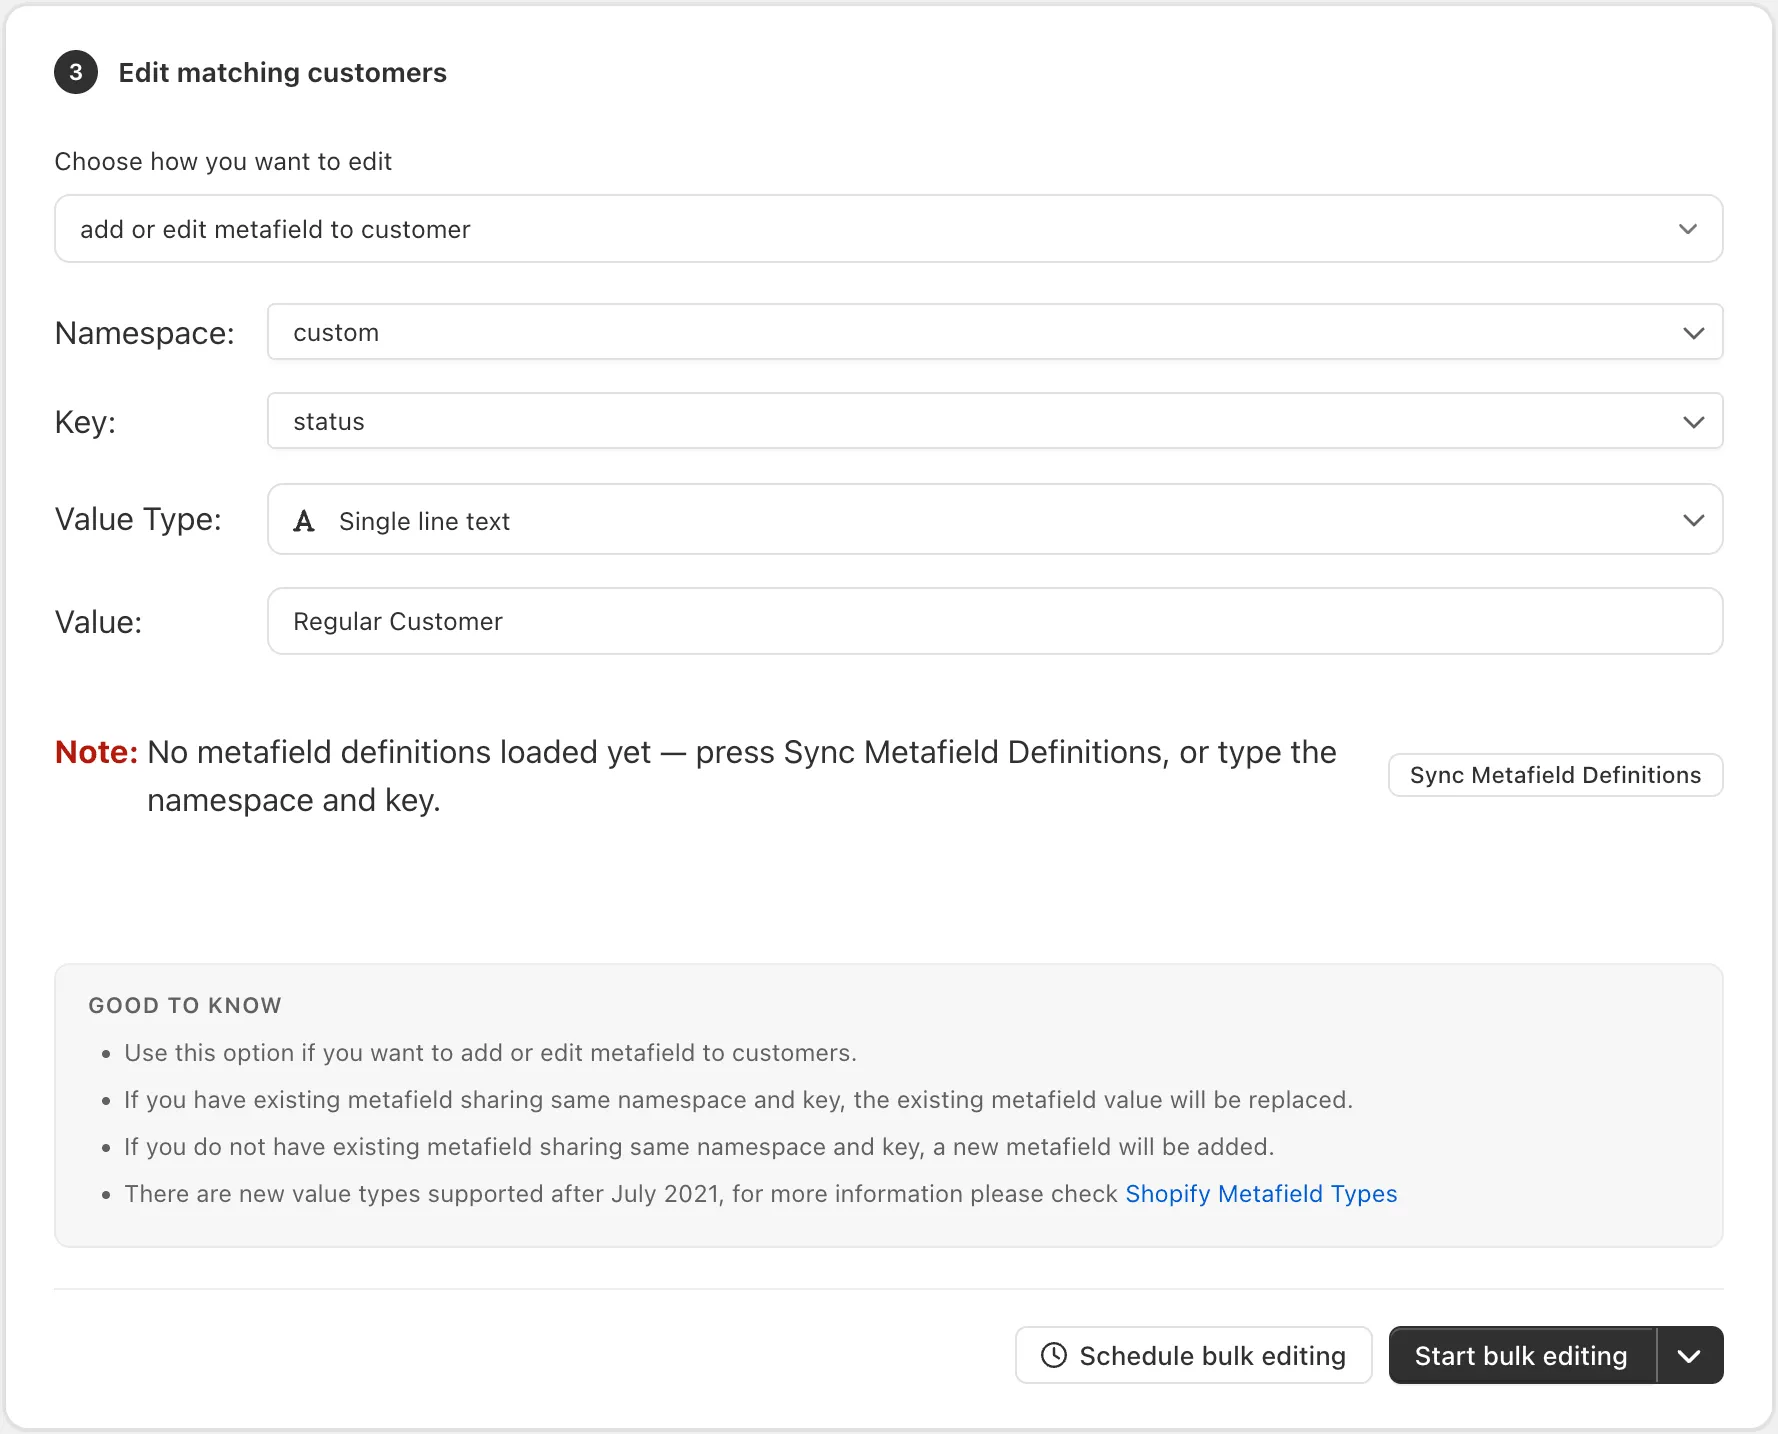
After doing so, you can run the task by clicking on the “Start bulk editing” button.
After that, you can check the results under Task History by clicking Details on the task.
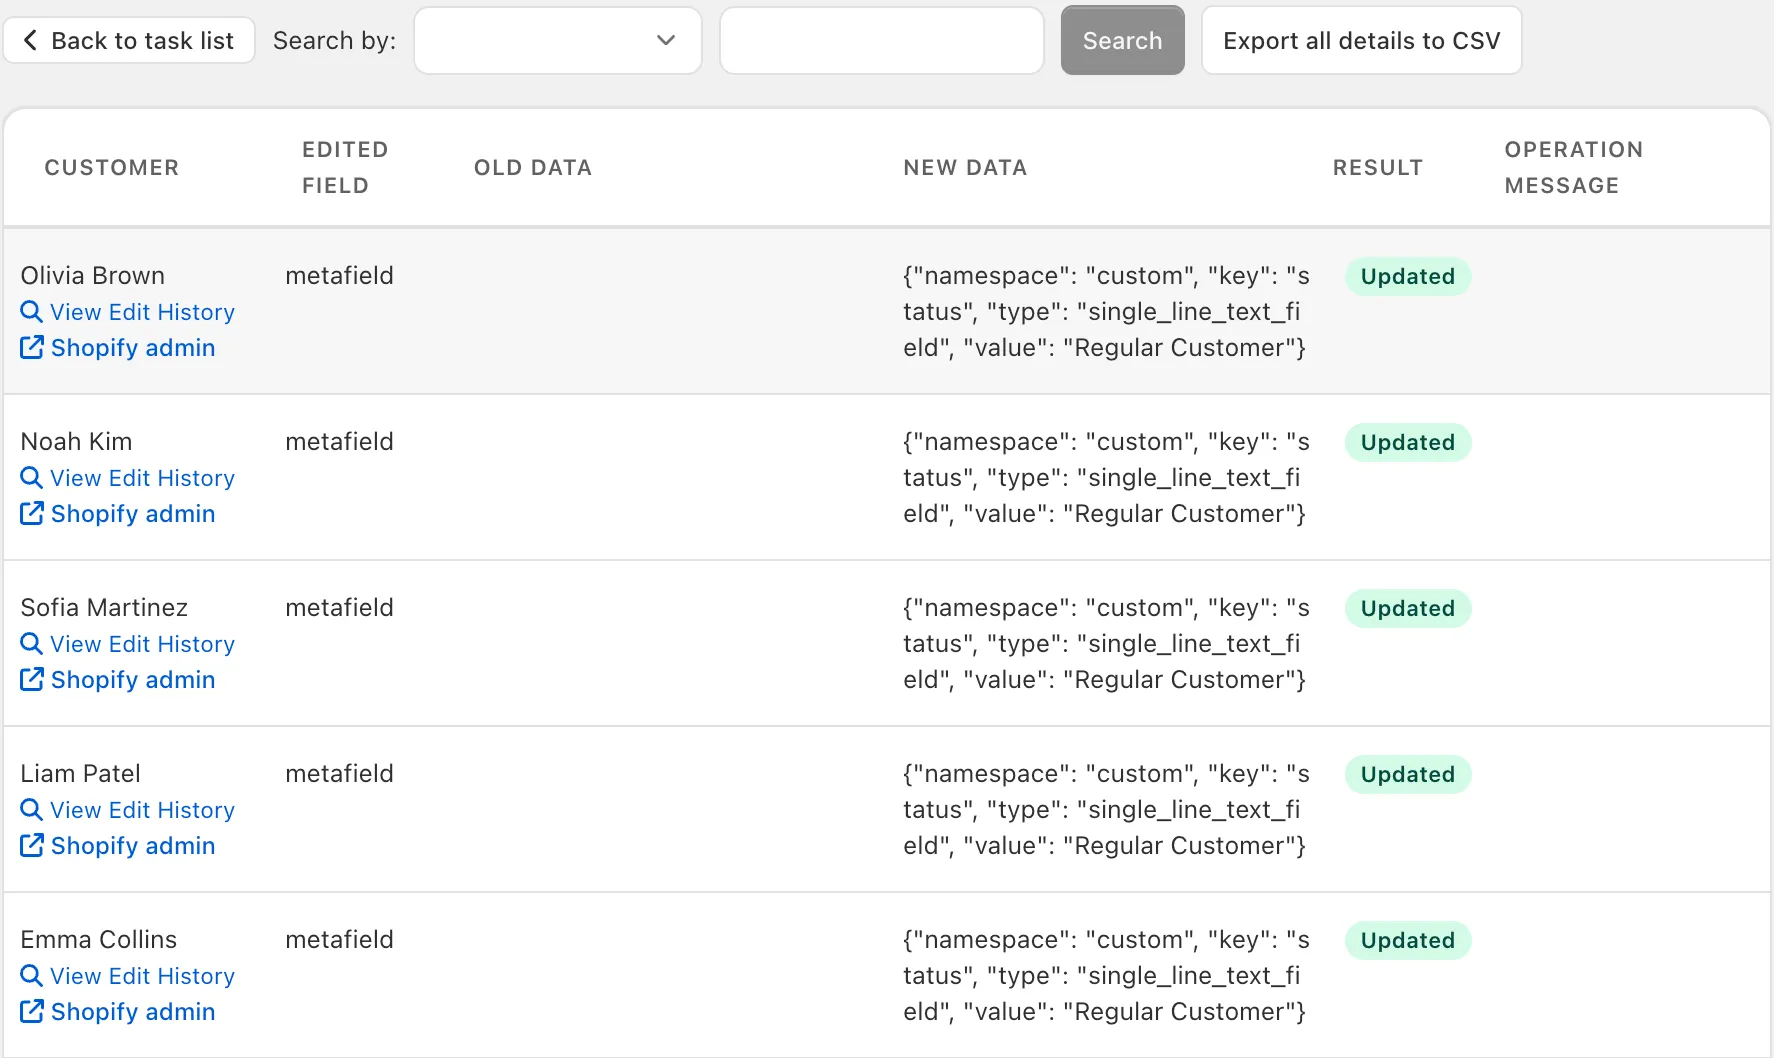
Or by previewing the customers again: the All metafields of customer column shows the new metafield, and Edit/View opens it.
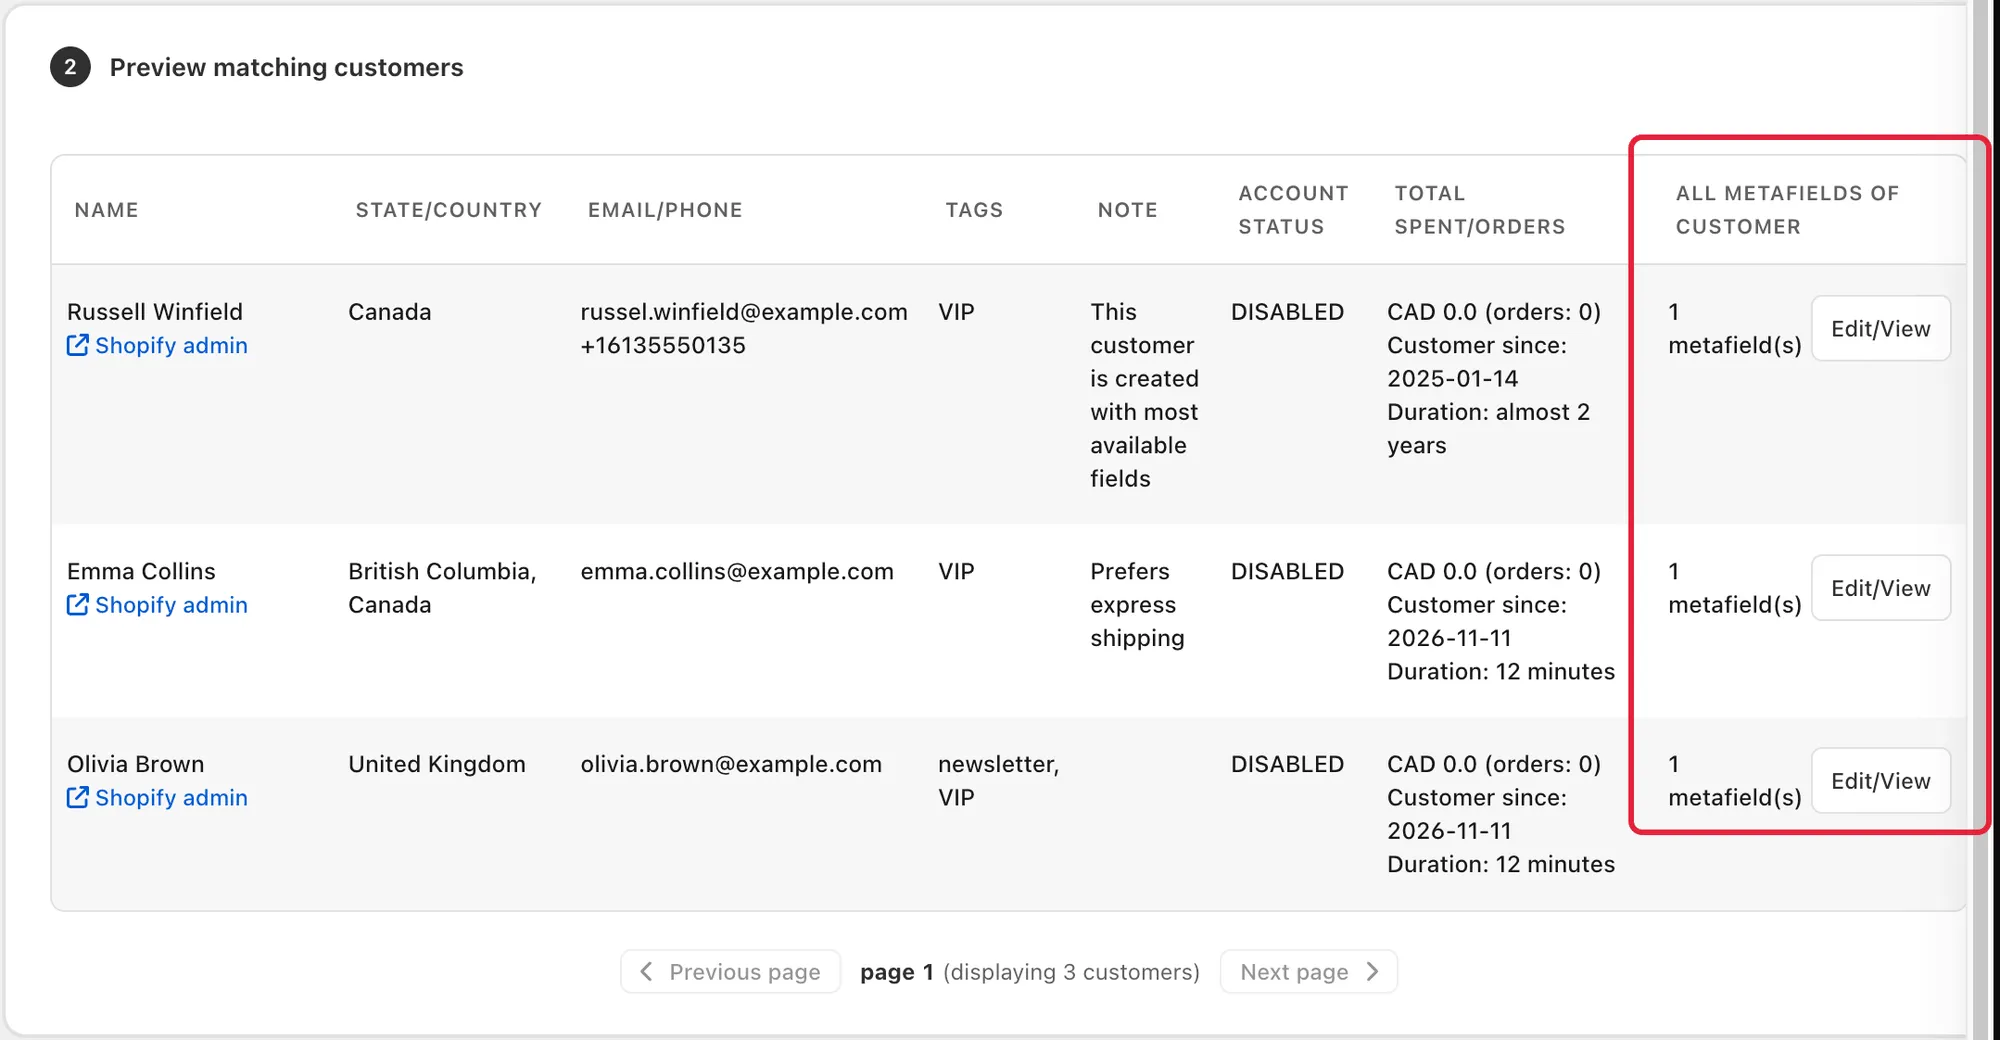
As you can see, the Metafield is added to all of my customers
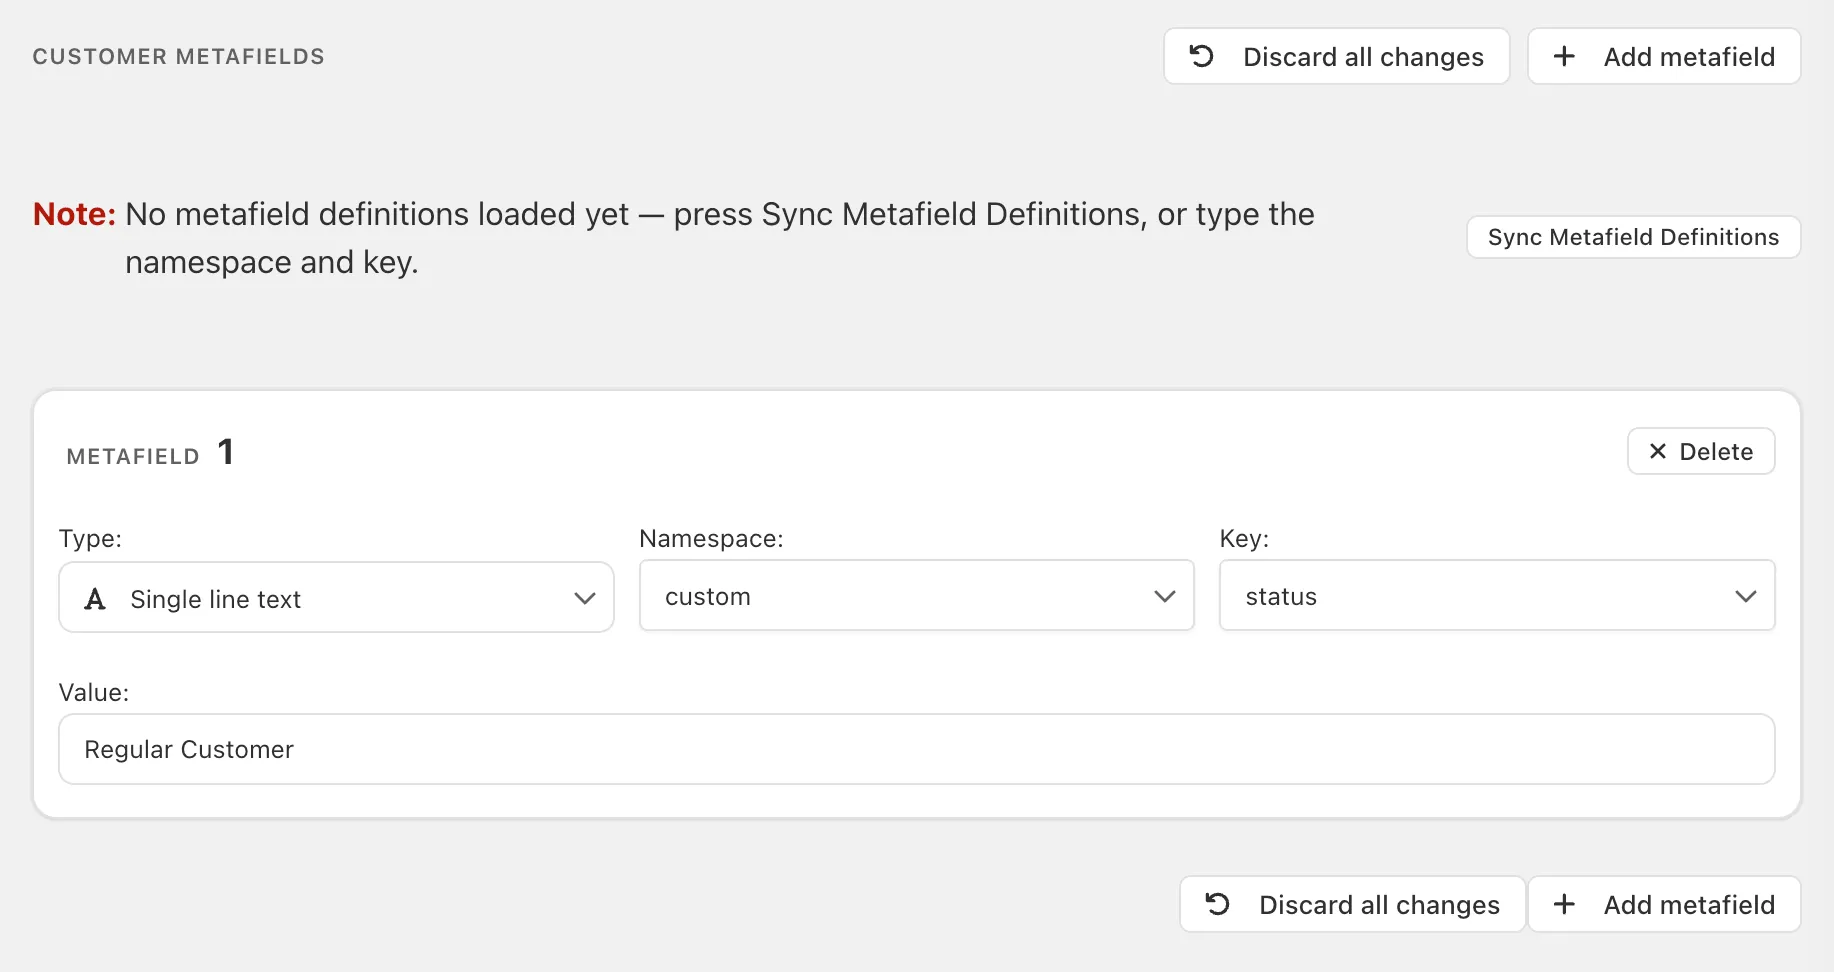
How to bulk edit customer metafields in Bulk Product Edit app